

 By
By Making exceptional homemade pizza that rivals your favorite wood-fired pizzeria does not require an imported Italian brick oven. It comes down to understanding the mechanics of gluten development, moisture control in sauces and cheeses, and mastering thermal transfer in a domestic kitchen.
Many home cooks end up with pale, doughy crusts, soggy centers, or burnt toppings because standard home recipes treat pizza like ordinary bread. Pizza requires intense, concentrated bottom heat, well-hydrated and properly fermented dough, and a measured hand with toppings.
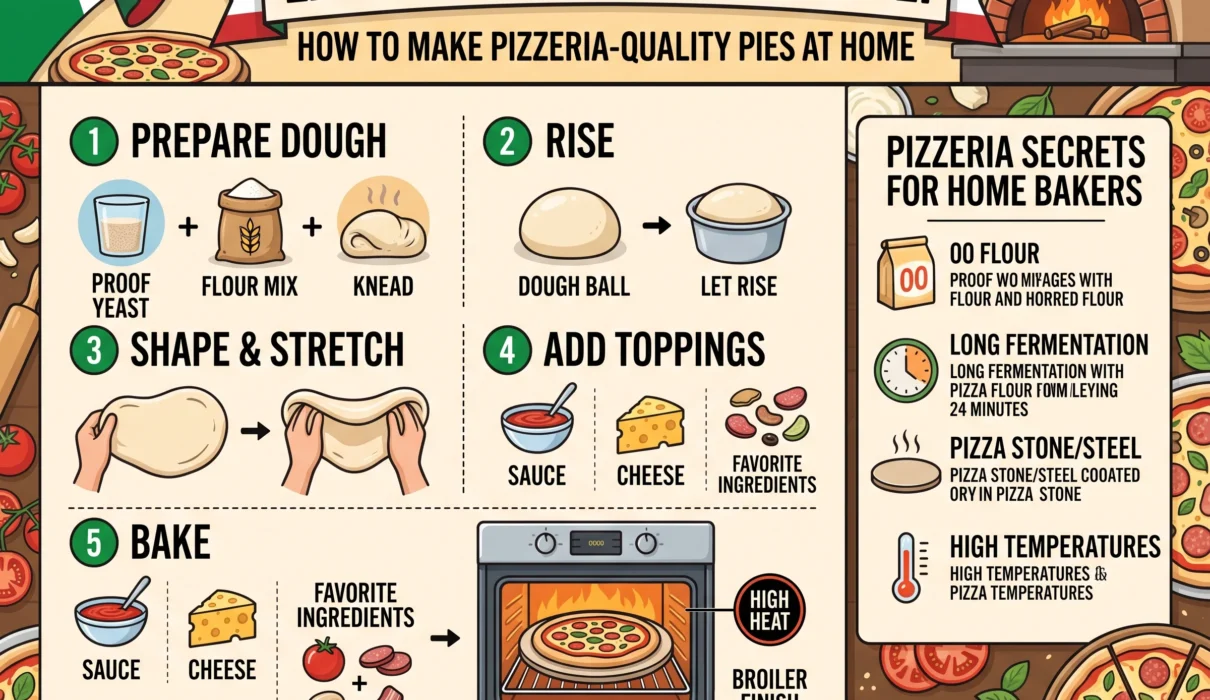
Whether you want a blistered Neapolitan-style rim, a crisp New York fold, or a golden pan crust, this complete pizza making guide covers every variable: from perfecting your homemade pizza dough and crafting an authentic no-cook sauce to selecting cheeses, dialing in oven setups, and troubleshooting common baking mistakes.
1. The Science of Homemade Pizza Dough
The crust is not merely a vehicle for cheese and toppings—it is 80% of the eating experience. A great pizza recipe relies on baker’s percentages and fermentation science rather than volume cups.
Baker’s Percentages Explained
In professional baking, all ingredient weights are calculated as a percentage relative to the total flour weight (which is always 100%):
$$\text{Hydration \%} = \left( \frac{\text{Weight of Water}}{\text{Weight of Flour}} \right) \times 100$$
- 60%–65% Hydration: Ideal for beginners and standard New York-style crusts. Easy to handle, holds structural integrity, and stretches cleanly without tearing.
- 68%–72% Hydration: Best for artisan, open-crumb, airy Neapolitan-style crusts. Yields a light cornicione (the puffed outer rim) with large air pockets, but requires confident handling on a well-floured peel.
- 75%+ Hydration: Reserved for high-walled Detroit-style pans or Roman pizza al taglio, where the wet dough is poured and dimpled directly into an oiled metal pan.
Flour Selection: All-Purpose vs. Bread Flour vs. Tipo 00
The flour you choose dictates protein strength, water absorption, and crust chewiness:
+------------------+------------------+--------------------+------------------------------------+
| Flour Type       | Protein Content  | Texture Profile    | Best Home Use Case                 |
+------------------+------------------+--------------------+------------------------------------+
| **Tipo 00**      | 11.5% - 12.5%    | Tender, delicate,  | High-heat outdoor pizza ovens      |
| (Italian Milled) | (Super-fine)     | crisp-chewy rim    | (750°F - 900°F / 400°C - 480°C)    |
+------------------+------------------+--------------------+------------------------------------+
| **Bread Flour**  | 12.5% - 14.0%    | Robust chew, strong| Standard home ovens with a steel   |
| (High Protein)   | (Hard wheat)     | gluten, big bubbles| (500°F - 550°F / 260°C - 290°C)    |
+------------------+------------------+--------------------+------------------------------------+
| **All-Purpose**  | 10.0% - 11.5%    | Softer bite, less  | Pan pizzas, cast iron skillet pies,|
| (Standard)       | (Medium wheat)   | elastic rebound    | quick same-day emergency doughs    |
+------------------+-----------------------------+------------------------------------+
Home Oven Pro Tip: In a standard domestic oven that tops out at 500°F–550°F (260°C–290°C), unbleached bread flour often outperforms imported Italian Tipo 00 flour. Tipo 00 is made from finely ground wheat intended to bake in 60 to 90 seconds at 900°F without scorching. In a slower 500°F home oven, Tipo 00 stays pale and dries out before browning. High-protein bread flour contains the enzymatic sugars and protein structure needed to brown richly and crisp up in a 6-to-8-minute home bake.
Cold Fermentation vs. Same-Day Dough
Yeast produces carbon dioxide (gas bubbles for rise) and alcohol/organic acids (complex, tangy flavor).
- Same-Day Dough (2 to 4 Hours): Functional for weeknights. Yields a pleasant, neutral bread flavor and a fine-grained crumb.
- Cold Fermentation (24 to 72 Hours in the Fridge): The gold standard. Chilling the dough slows yeast activity to a crawl while enzymes (amylases and proteases) continue breaking down complex starches into simple sugars and relaxing the gluten sheath. This process delivers deep, sourdough-adjacent flavor, creates delicate charred bubbles (leopard spotting), and makes the dough significantly easier to stretch without springing back.
2. Master Homemade Pizza Dough Recipe (Step-by-Step)
This formula yields three 12-inch pizzas at 65% hydration—the sweet spot for home ovens.
THE FORMULA (BY GRAM WEIGHT):
• Bread Flour (100%):            500g
• Water (Lukewarm, 65%):         325g
• Fine Sea Salt (2.6%):          13g
• Instant Dry Yeast (0.6%):      3g (approx. 1 tsp)
• Extra Virgin Olive Oil (2.0%): 10g (approx. 2 tsp)
• Honey or Sugar (1.0%):         5g (enhances browning in home ovens)
1.Mix and Hydrate :Hands-on: 5 minutes.
Pour lukewarm water (80°F–85°F / 27°C–29°C) into a large bowl. Whisk in the instant yeast and honey until dissolved. Add the bread flour and stir with a wooden spoon or spatula until a shaggy, ragged dough forms with no dry flour remaining. Cover the bowl with a damp towel and let it rest undisturbed for 20 minutes (the autolyse phase, which kickstarts gluten formation and water absorption).
2.Knead and Incorporate Salt :Hands-on: 8 to 10 minutes.
Sprinkle the fine sea salt and olive oil over the rested dough. Turn the dough out onto an unfloured countertop. Knead vigorously by pushing the dough away with the heel of your hand, folding it over itself, rotating 90 degrees, and repeating. Continue for 8 to 10 minutes until the surface transitions from sticky and lumpy to satiny, smooth, and elastic. The dough should spring back slowly when poked with an oiled finger.
3.Bulk Fermentation :Ambient room temperature: 1.5 to 2 hours.
Shape the dough into a tight ball by cupping your palms around it and pulling it across the counter to build surface tension. Lightly coat a large bowl with olive oil, place the dough inside, and cover tightly with plastic wrap or a fitted lid. Let it rise at room temperature (68°F–72°F / 20°C–22°C) until doubled in volume, roughly 90 to 120 minutes.
4.Portion, Ball, and Cold Proof :Refrigerate for 24 to 72 hours for best flavor.
Turn the dough onto a clean counter. Using a bench knife, divide into 3 equal portions (approx. 280g each). Cup your palm over each piece and roll it against the counter in circular motions to form tight, smooth spheres. Place each dough ball into an individually oiled, airtight container or onto a rimmed sheet pan lined with parchment, leaving at least 3 inches between balls. Transfer to the refrigerator for 24 to 72 hours.
5.The Final Temper :Prerequisite before stretching: 60 to 90 minutes.
Remove the dough containers from the refrigerator 60 to 90 minutes before baking. Cold dough contracts, tears easily, and refuses to stretch. The dough balls must warm to room temperature (around 65°F–68°F / 18°C–20°C) so the gluten relaxes completely.
3. The Sauce: Why You Should Never Cook Your Pizza Sauce
The single most common error home cooks make with pizza sauce is simmering it on the stovetop for hours like a pasta sauce.
PASTA SAUCE VS. PIZZA SAUCE:

Pasta Sauce:  Simmered 1-3 hours  ---> Deep, rich, cooked, sweet, concentrated
Pizza Sauce:  RAW, BLENDED COLD  ---> Bright, fresh, acidic, cooks ON the pizza
A great pizza sauce must taste vibrant, bright, and slightly acidic to cut through the richness of melted cheese and fatty meats. Because the pizza bakes at 500°F+, an already-cooked sauce overcooks in the oven, turning dull, heavy, and metallic.
The 3-Minute Authentic Pizza Sauce Recipe
- 1 can (28 oz / 800g) Whole peeled Italian plum tomatoes (San Marzano DOP or high-grade California plum tomatoes)
- 1 tsp (6g) Fine sea salt
- 1 tbsp (15ml) High-quality extra virgin olive oil
- 1 small clove Garlic, microplaned or finely minced (optional)
- 2 to 3 fresh basil leaves, torn
- 1/2 tsp Dried oregano (optional, classic for New York style)
Preparation
- Empty the canned whole tomatoes into a large bowl.
- Crush them thoroughly by hand or pulse them with an immersion blender for 3 to 5 seconds. Avoid pureeing the sauce into a smooth liquid; you want tiny tomato fragments for texture.
- Stir in the salt, olive oil, minced garlic, and oregano.
- Let the sauce sit at room temperature for 30 minutes to marry flavors. Keep uncooked until it meets the pizza crust in the oven.
4. Cheese and Toppings: The Art of Restraint
The hallmark of amateur homemade pizza is topping overload. Piling on too much sauce, excessive cheese, and mounds of raw vegetables introduces surplus water that turns your crust into a soggy, limp mess.
THE CRUST-LOAD EQUATION:
Light toppings  ---> Fast steam release  ---> Crisp bottom + Puffy cornicione
Heavy toppings  ---> Trapped liquid     ---> Soggy center + Pale, dense gumline
Choosing the Right Cheese
Not all mozzarella performs the same under extreme heat:
- Fresh Mozzarella (Fior di Latte / Buffalo Mozzarella): Exceptional milky flavor, but holds 50% to 60% water. If sliced and applied directly, it releases a puddle of liquid onto your crust. The Solution: Slice fresh mozzarella into 1/4-inch planks and let them drain in a colander over a bowl for at least 1 hour. Pat dry with paper towels before topping.
- Low-Moisture, Whole-Milk Block Mozzarella: The standard for New York-style pizza. Melts smoothly with classic stretch, bubbles evenly, and won’t make the crust soggy. Always grate your own block; pre-shredded bagged cheese is coated in potato starch and cellulose powder, which prevents clean melting and causes greasy scorching.
- Hard Finishing Cheeses: Parmigiano-Reggiano, Pecorino Romano, or Grana Padano should be finely microplaned over the sauce before the mozzarella goes on, or dusted over the crust the moment it emerges hot from the oven.
Preparing Common Toppings for Success
- Vegetables (Mushrooms, Bell Peppers, Onions): Raw vegetables release water as their cell walls collapse in heat. Sauté sliced mushrooms and peppers in a dry pan for 3 minutes to expel excess moisture before placing them on the pie.
- Meats (Sausage vs. Pepperoni): Raw Italian sausage should be pinched into marble-sized pieces so it cooks through in 6 to 8 minutes. Pepperoni should be sliced 1/8-inch thick in natural casings so the edges curl upward into crispy, grease-holding “cups.”
- Fresh Herbs (Basil, Arugula): Delicate basil scorches into bitter black flakes if baked the entire time. Either tuck basil leaves under slices of fresh cheese so they steam gently, or tear fresh leaves over the finished pizza immediately after removing it from the oven.
5. Stretching the Dough Without a Rolling Pin
A rolling pin is the enemy of airy artisan pizza. Rolling compresses the dough and crushes the delicate carbon dioxide bubbles your yeast spent days developing, leaving you with a dense, cracker-like rim.
HOW TO SHAPE A PIZZA BASE:

1. DUST WORKSPACE       --> Generous mix of semolina flour and bread flour
2. DEFINE THE RIM       --> Press fingertips 1/2-inch inside the edge; leave rim untouched
3. FLATTEN THE CENTER   --> Push air outward from the middle into the crust ring
4. THE STEERING WHEEL   --> Lift dough vertically; rotate along the edges using gravity
5. BACK-OF-HAND STRETCH --> Rest dough on knuckles; gently pull outwards until 12 inches
Step-by-Step Stretching Technique
- Flour the Station: Combine equal parts all-purpose flour and coarse semolina flour. Semolina acts like miniature ball bearings under the dough, preventing sticking and adding a crisp crunch to the base.
- Drop the Dough Ball: Gently ease one proofed dough ball into the flour mixture, coating both sides without squishing it. Transfer to a clean board.
- Define the Cornicione: Starting 1/2 inch from the outer edge, press your fingertips into the dough, working in a circle. This pushes trapped gas outward into the rim while leaving the center flat.
- Flatten the Interior: Use the pads of your fingers to press down the center, flattening it into a 7-inch disc while keeping the raised 1/2-inch border intact.
- The Knuckle Stretch: Pick up the dough disc and drape it over the backs of your closed fists. Gently pull your hands apart, rotating the dough 45 degrees with every pull. Gravity and the dough’s own weight will stretch it naturally to a uniform 10-to-12-inch circle. The center should be thin enough to let light pass through when held up.
6. Oven Setups and Baking Thermodynamics
A standard home kitchen oven maxes out at 500°F–550°F (260°C–290°C), while commercial pizza ovens run at 750°F–900°F (400°C–480°C). Overcoming this temperature deficit requires maximizing conductive thermal mass.
HEAT TRANSFER COMPARISON:

BAKING STEEL (1/4" - 3/8" Carbon Steel)
Thermal Conductivity: 18x higher than stone | Preheat: 45-60 mins | Bake: 4-6 mins
---------------------------------------------------------------------------------
PIZZA STONE (Cordierite Ceramic)
Thermal Conductivity: Moderate               | Preheat: 60 mins      | Bake: 7-9 mins
---------------------------------------------------------------------------------
STANDARD INVERTED SHEET PAN (Thin Aluminum)
Thermal Conductivity: Low heat retention     | Preheat: 20 mins      | Bake: 10-12 mins
Method 1: The Baking Steel Setup (The Best Result)
A 1/4-inch or 3/8-inch carbon steel plate stores enormous thermal energy and transfers heat to the dough far faster than ceramic stone.
- Position the baking steel on the second rack from the top (approx. 6 to 8 inches below your broiler element).
- Preheat your oven to its absolute maximum setting (500°F or 550°F / 260°C or 290°C) for at least 45 to 60 minutes before baking. The air temperature registers quickly, but the steel requires a full hour to saturate with heat.
- Launch the assembled pizza directly onto the steel using a wooden or perforated metal peel dusted with semolina.
- After 3 minutes of baking, switch your oven selector to HIGH BROIL. The intense direct radiant heat from above cooks the toppings and chars the puffed crust rim, while the stored heat in the steel crisps the underside. Total bake time: 4 to 6 minutes.
Method 2: The Cast Iron Skillet Method (No Peel Required)
If you don’t own a peel or steel, a 12-inch heavy cast iron skillet creates an incredible pan pizza:
- Coat the bottom and sides of a cold cast-iron skillet with 1.5 tablespoons of extra virgin olive oil.
- Press your relaxed dough ball across the bottom, dimpling it to the edges. Let it rest for 20 minutes if it springs back, then press to the rim.
- Spread sauce to within 1/4 inch of the edge; top with shredded mozzarella, meats, and seasonings.
- Place the skillet over high heat on your stovetop burner for 2 to 3 minutes until the bottom begins to sizzle and fry.
- Immediately transfer the skillet into a preheated 500°F (260°C) oven on the middle rack for 10 to 12 minutes until the top is bubbling and the crust is deep golden brown.
7. Step-by-Step Pizza Assembly and Peel Launch
The most nerve-wracking moment for home pizza makers is sliding the raw pie off the peel into the oven. Follow this protocol to eliminate sticking:
THE "SHAKE TEST" ROUTINE:

[ Dust Peel with Semolina ]
           │
           ▼
[ Lay Stretched Dough Down ]
           │
           ▼
[ SHAKE PEEL ]  ---> Does it slide freely?
           │         YES: Proceed to toppings
           │         NO:  Lift edges, blow air underneath, add more semolina
           ▼
[ Apply Sauce & Cheese FAST (Under 90 Seconds) ]
           │
           ▼
[ FINAL SHAKE TEST ] ---> Slides freely?
           │              YES: Launch into oven with smooth back-and-forth flick
           │              NO:  Gently lift stuck edge, toss semolina underneath
- Work Fast: Moisture from the sauce seeps into the raw dough the longer it sits on the peel. Keep sauce, cheese, and toppings prepped within arm’s reach. Aim to sauce, top, and launch the pizza in under 90 seconds.
- The Launch Motion: Open the oven door wide. Angle the peel at roughly 20 degrees with its front tip touching the back edge of the steel. Use short, rhythmic back-and-forth jiggles to walk the pizza off the peel onto the hot surface. Once the front edge catches the steel, slide the peel backward in one confident motion.
8. Master Troubleshooting Guide
| Issue | Root Cause | Immediate Fix / Prevention |
| Dough snaps back like a rubber band when stretching | Gluten is under tension; dough is too cold or overworked. | Cover with a damp towel and let it rest on the counter for 15–20 minutes so gluten relaxes. |
| Soggy, wet center beneath the cheese | Too much sauce; wet, undrained fresh mozzarella; oven floor heat too low. | Limit sauce to 3–4 tbsp; drain fresh mozzarella for 1 hour; use a baking steel preheated for 60 mins. |
| Pizza stuck to the peel during launch (The Accordion disaster) | Dough sat too long on peel; pinhole tear in dough; insufficient semolina dusting. | Assemble within 90 seconds; dust peel with coarse semolina; perform the “shake test” before saucing. |
| Crust is pale and dried out like cardboard | Oven temperature too low; using Tipo 00 flour in a 450°F oven; dough lacked oil/sugar. | Switch to bread flour; add 1% honey or oil to dough; bake on the highest oven setting with broil assist. |
| Cheese separates and turns into a yellow oil puddle | Using pre-shredded cheese; low-quality cheese cooked too long at low temperatures. | Use whole-milk, low-moisture block mozzarella grated fresh; chill cheese in freezer 15 mins before topping. |
9. The Essential Homemade Pizza Equipment Checklist
You don’t need commercial appliances to turn out incredible pies, but these few focused tools make a significant difference:
- Digital Kitchen Scale: Accurate to 1g; eliminates the variability of measuring flour by volume.
- 1/4-Inch Baking Steel: Provides the thermal mass and conductivity needed to blister crust bottoms in under 6 minutes.
- Wooden Pizza Peel: Wood absorbs surface humidity, making it vastly superior to metal for assembling and launching raw dough without sticking.
- Perforated Metal Peel or Tongs: Ultra-thin metal makes it easy to slip under, rotate, and retrieve hot, fully baked pizzas.
- Rocker Blade Pizza Cutter: Slices cleanly through crispy crusts in one downward press without dragging cheese and toppings across the surface.
The Pizzeria Finish: Serving Your Pie
The moment your pizza emerges from the oven, resist the urge to slice it immediately. Transfer it to a wire cooling rack for 60 to 90 seconds. If placed directly onto a solid metal tray or wooden cutting board, trapped bottom steam turns your crispy crust soft and spongy.
Finish the hot pizza with a light drizzle of fruity extra virgin olive oil, a flurry of microplaned Parmigiano-Reggiano, and fresh torn basil leaves. Slice into wedges with a sharp rocker cutter, and serve immediately.
Making great pizza at home is an iterative craft. Once you understand the interplay between dough fermentation, moisture discipline, and intense conductive heat, your domestic kitchen will reliably turn out pies that outshine the best delivery in town.