

 By
By Baking is equal parts culinary art and precise chemistry. Unlike savory cooking—where a pinch of salt here or an extra splash of broth there rarely ruins a recipe—baking depends on exact chemical reactions, thermodynamic controls, and physical structural development. When flour, fat, sugar, eggs, and leaveners meet heat, they transform through caramelization, starch gelatinization, and protein coagulation.
Stepping into baking can feel intimidating, but every complex pastry is built on a few core principles. This beginner baking guide breaks down essential baking tips, foundational basic baking techniques, and practical troubleshooting advice so you can bake bread, cakes, cookies, and pastries with complete confidence.
Mise en place: Preparing and measuring your ingredients before baking ensures consistent success.. Source : Cleardesign1 / Getty Images
1. The Golden Rule: Measuring by Weight vs. Volume
If there is a single habit that separates consistent bakers from frustrated beginners, it is using a digital kitchen scale instead of measuring cups.
Why Volume Measurements Fail
Flour is compressible. When scooped directly from a bag with a measuring cup, the flour packs down tightly. Depending on how firmly you pack the cup, a single standard cup of all-purpose flour can weigh anywhere from 115 grams to over 160 grams.
A recipe developed around 120 grams of flour that receives 160 grams ends up with over 30% excess dry matter. That single discrepancy produces dense cakes, dry muffins, and tough cookies that fail to spread.
THE FLOUR MEASUREMENT DISCREPANCY:

Scooped directly from bag:   ~150g - 165g  (Heavy, dry, leaden results)
Spoon-and-level method:      ~125g - 135g  (Better, but variable)
Weighed on digital scale:     120.0g       (100% precision every bake)
How to Use a Digital Kitchen Scale
- Place your mixing bowl onto the scale platform.
- Press the Tare (or Zero) button to zero out the bowl’s weight.
- Spoon your ingredient directly into the bowl until the exact target gram weight displays.
- Tare the scale again before adding the next ingredient. This keeps dishes to a minimum and guarantees precision.
The “Spoon and Level” Method (If You Must Use Cups)
If a digital scale is unavailable:
- Fluff your flour in its container using a fork or whisk.
- Gently spoon the aerated flour into your dry measuring cup until it heathers over the rim.
- Level off the excess across the rim using the flat back of a butter knife.
- Never scoop directly from the bag, and never tap or shake the cup down.
2. Understanding Your Ingredients and Their Science
Every baking ingredient plays a distinct physical and chemical role in the structure, moisture, and rise of your baked goods. Understanding what each component does helps you grasp baking for beginners at a structural level.
+------------------+-----------------------------+------------------------------------+
| Ingredient       | Primary Function            | What Happens If Out of Balance     |
+------------------+-----------------------------+------------------------------------+
| **Flour**        | Structure (Gluten framework)| Too much: dry, dense, tough        |
|                  | Starch gelatinization       | Too little: collapsed, runny batter|
+------------------+-----------------------------+------------------------------------+
| **Sugar**        | Moisture, tenderness, browning| Too much: greasy, over-spread, dark|
|                  | (Hygroscopic & caramelizing)| Too little: pale, bland, dry crumb |
+------------------+-----------------------------+------------------------------------+
| **Fat (Butter)** | Shortens gluten, tenderizes,| Too much: puddle-like spread, oily |
|                  | carries flavor, aerates     | Too little: rubbery, cardboard feel|
+------------------+-----------------------------+------------------------------------+
| **Eggs**         | Structure (protein), moisture| Too much: spongy, rubbery texture  |
|                  | emulsification (lecithin)   | Too little: crumbly, dense, fragile|
+------------------+-----------------------------+------------------------------------+
| **Leaveners**    | Gas production (CO2 lift)   | Too much: bitter taste, sunken tops|
|                  | Cell expansion              | Too little: dense, flat, doughy    |
+------------------+-----------------------------+------------------------------------+
| **Salt**         | Flavor enhancer, tightens   | Too much: unpalatably salty        |
|                  | gluten, regulates yeast     | Too little: flat, cloying sweetness|
+------------------+-----------------------------+------------------------------------+
Flour Types and Protein Content
Flour’s strength comes from two proteins: gliadin and glutenin. When hydrated and mixed, they form gluten, an elastic network that traps expanding gas bubbles.
- Cake Flour (7%–9% protein): Finely milled and chlorinated; produces tender, fine-crumbed cakes and melt-in-your-mouth shortbreads.
- All-Purpose Flour (10%–12% protein): The versatile standard. Balanced enough for sandwich bread, chewy cookies, and flaky pie dough.
- Bread Flour (12%–14% protein): High protein creates a strong, elastic gluten web capable of sustaining high rises and giving artisan sourdough and bagels their signature chew.
Baking Soda vs. Baking Powder: The Chemical Difference
- Baking Soda (Sodium Bicarbonate): A base that requires both an acidic ingredient (buttermilk, lemon juice, yogurt, brown sugar, natural cocoa powder) and liquid to release carbon dioxide gas. It reacts instantly upon contact with moisture.
- Baking Powder: Contains sodium bicarbonate paired with a dry powdered acid (like cream of tartar) and cornstarch. Most commercial powders are double-acting: they release a small burst of gas when hydrated, and a larger second lift when exposed to oven heat.
The Role of Temperature in Fats
Butter functions differently depending on its physical state:
- Cold Butter (Chilled, 35°F–40°F / 2°C–4°C): Essential for flaky pie crusts, biscuits, and scones. During baking, the water within pockets of solid butter flashes into steam, forcing layers of dough apart before the fat melts.
- Room Temperature Butter (65°F–68°F / 18°C–20°C): Crucial for creaming. At this temperature, butter yields to a finger press without melting or feeling greasy, allowing sugar crystals to cut tiny air pockets into the fat.
- Melted Butter: Yields dense, chewy textures (fudgy brownies and chewy chocolate chip cookies) by coating flour particles without incorporating aerated pockets.
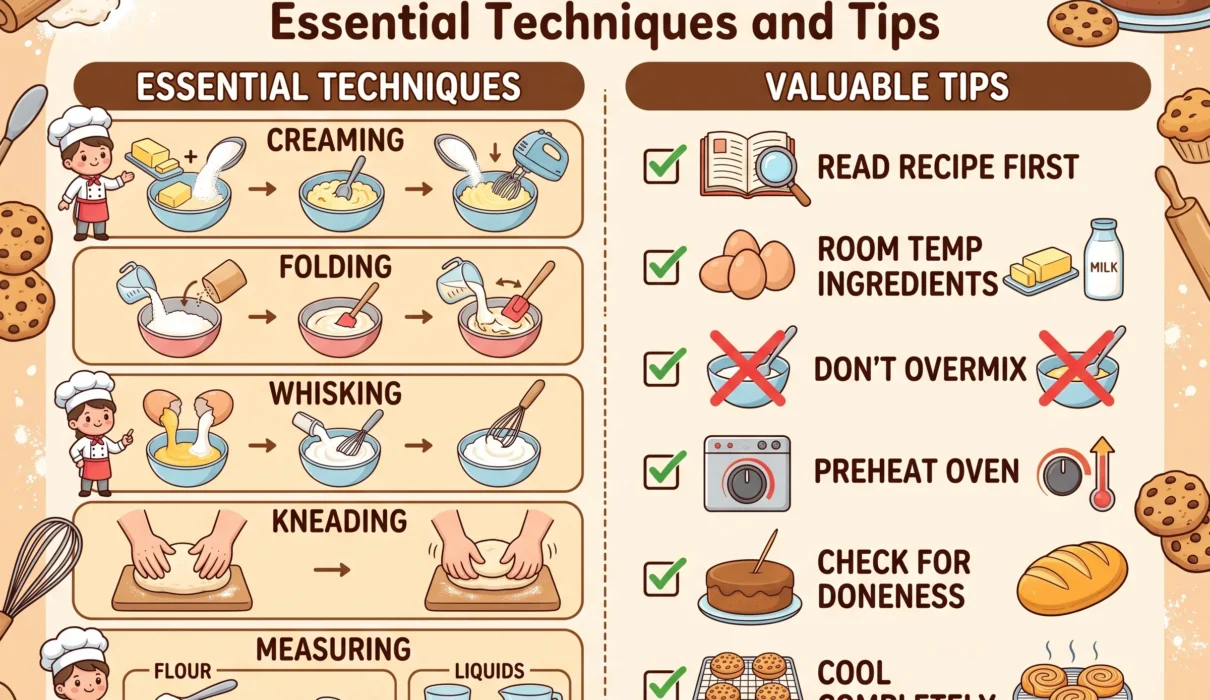
3. Basic Baking Techniques Every Beginner Must Master
Mastering these five fundamental mixing and handling methods will carry you through hundreds of recipes.
THE 5 CORE MIXING TECHNIQUES:

1. CREAMING METHOD      --> Butter + Sugar beaten to incorporate tiny air cells (Cakes, Cookies)
2. CUTTING IN FAT       --> Cold fat worked into dry flour until pea-sized (Pies, Biscuits)
3. FOLDING GENTLY       --> J-motion with rubber spatula to preserve air (Soufflés, Sponge cakes)
4. THE MUFFIN METHOD    --> Wet ingredients poured into dry; stirred minimally (Muffins, Quick breads)
5. KNEADING DOUGH       --> Stretching & folding to organize gluten strands (Breads, Pizza dough)
Technique 1: The Creaming Method
Creaming is not merely blending butter and sugar together; it is mechanical leavening.
- Beat room-temperature butter and granulated sugar together for 3 to 5 minutes on medium-high speed.
- The jagged edges of the sugar crystals carve microscopic pockets into the semi-solid fat.
- The mixture will transition from dense and yellow to pale, fluffy, and visibly increased in volume.
- Add eggs one at a time, allowing the yolk’s natural lecithin to emulsify the fat and water before incorporating the next.
Technique 2: Cutting In Butter
- Used to produce flaky, tender layers in pie crusts, scones, and southern biscuits.
- Cut chilled butter into small cubes and drop them into the flour mixture.
- Using a pastry blender, two butter knives, or your fingertips, press and rub the butter cubes into the flour.
- Stop when the fat pieces range from the size of coarse breadcrumbs to small green peas. When the dough enters the hot oven, those flattened butter flakes create pockets of steam that form distinct, flaky sheets.
Technique 3: The Gentle Fold
Folding combines a dense mixture with an aerated one (such as whipped egg whites, whipped cream, or sifted flour) without deflating trapped air bubbles.
- Use a wide, flexible silicone spatula.
- Cut down through the center of the bowl to the bottom.
- Sweep the spatula along the curved base of the bowl toward yourself, lift the batter upward, and fold it over the surface.
- Rotate the bowl 90 degrees and repeat the motion in a smooth rhythm until no streaks of unincorporated mixture remain. Never stir in circular motions.
Technique 4: The Muffin Method
Designed to prevent overworking gluten in quick breads, pancakes, and muffins:
- Whisk all dry ingredients together in one bowl.
- Whisk all liquid ingredients (including melted butter or oil) in a second bowl.
- Pour the wet mixture into the dry ingredients.
- Stir with a wooden spoon or spatula just until the flour is moistened—typically 10 to 15 strokes. The batter should look lumpy and uneven. Over-mixing leads to rubbery muffins riddled with elongated air tunnels.
4. Oven Thermodynamics and Pan Mechanics
Your oven is a dynamic heat chamber, and its environment dictates whether your leaveners lift, set, or scorch.
The Necessity of an Oven Thermometer
Most home ovens are miscalibrated by 15°F to 35°F (8°C to 20°C). If your oven runs hot, the exterior of a cake will set and brown before the center expands, creating a cracked, domed peak and a raw core. Hang an inexpensive stainless steel analog oven thermometer on the center rack to verify true temperatures before baking.
Rack Placement Strategy
- Center Rack (Default): Provides the most balanced radiant and convective heat distribution. Ideal for single cake layers, quick breads, and casseroles.
- Bottom Third: Excellent for fruit pies and artisan bread baked in Dutch ovens, where you need strong bottom conductive heat to crisp the base crust.
- Top Third: Useful during the final 3 to 5 minutes to brown meringues, broil crumb toppings, or color cookies.
Pan Material Matters
- Light-Colored Aluminum: The gold standard for cakes, cookies, and quick breads. Aluminum conducts heat evenly and reflects radiant energy, allowing items to rise smoothly without over-browning around the edges.
- Dark or Non-Stick Metal: Absorbs heat rapidly. Dark pans bake edges much faster; if using dark non-stick bakeware, lower the specified oven temperature by 25°F (15°C) to prevent scorched bottoms.
- Glass Bakeware: Retains heat for long periods but conducts slowly. Excellent for pies and crisps where you want to monitor browning through the bottom, but poor for delicate sponge cakes.
5. Master Troubleshooting Guide: What Went Wrong?
Baking mistakes provide direct insight into ingredient science. Use this reference to diagnose common issues:
| Symptom | Root Cause | Solution for Next Time |
|---|---|---|
| Cake Sinks in the Center | • Under-baking • Expired leavener • Opening the oven door too early | • Check interior temp with a toothpick or probe (205°F / 96°C) • Test baking powder in water to confirm fizz • Keep oven closed during the first 75% of bake time |
| Cookies Spread into a Flat Puddle | • Butter was melted or too warm • Baking sheet was warm from previous batch • Insufficient flour | • Chill dough balls for 30–60 minutes before baking • Allow baking sheets to cool completely between batches • Weigh flour on a scale |
| Tough, Rubbery Muffins or Cakes | • Excessive gluten development from over-mixing • Too much liquid or flour | • Stir batter just until dry patches disappear (10–15 strokes) • Avoid electric mixers for folding dry ingredients |
| Pie Crust is Shrinking or Soggy | • Dough wasn’t rested; gluten under tension • Oven floor heat insufficient | • Chill dough for at least 1 hour after rolling • Blind bake crust on a preheated pizza stone or baking steel |
| Bread Loaf is Dense and Heavy | • Dead yeast (water was too hot) • Under-kneaded or under-proofed | • Ensure yeast hydration water is 100°F–110°F (38°C–43°C) • Perform the “poke test” to evaluate proofing |
6. The Beginner Baker’s Essential Equipment Checklist
You do not need a kitchen full of high-end appliances to produce bakery-quality results. Focus on these durable essentials:
THE FOUNDATIONAL TOOLKIT:

[ PRECISION ]
• Digital Kitchen Scale (measures to 0.1g or 1g increments)
• Oven Thermometer (stainless steel hanging gauge)
• Instant-Read Digital Probe Thermometer

[ PREP & MIXING ]
• Set of Stainless Steel Mixing Bowls (nesting)
• Heat-Resistant Silicone Spatulas (seamless construction)
• Stainless Steel Balloon Whisk
• Measuring Spoons & Liquid Measuring Pitcher

[ BAKEWARE & FINISHING ]
• Half-Sheet Baking Pans (heavy-gauge rimmed aluminum)
• Unbleached Parchment Paper Rolls (prevents sticking, preserves pans)
• Wire Cooling Racks (prevents trapped steam sogginess)
• 8-Inch or 9-Inch Round Aluminum Cake Pans (light finish)
7. The Beginner’s First Project: Foolproof Chocolate Chip Cookies
Put these principles into practice with this reliable cookie formula.
- Yield: 16 large cookies | Bake Temp: 375°F (190°C) | Bake Time: 10–12 minutes
The Formula (By Weight):
- 250g All-purpose flour
- 1/2 tsp (3g) Baking soda
- 1/2 tsp (3g) Fine sea salt
- 170g Unsalted butter (melted and cooled slightly)
- 150g Dark brown sugar (packed)
- 100g Granulated white sugar
- 1 Large egg + 1 egg yolk (room temperature)
- 2 tsp (10g) Pure vanilla extract
- 200g Semi-sweet chocolate chunks or chips
Step-by-Step Execution:
- Combine Dry Goods: Whisk flour, baking soda, and salt in a medium bowl; set aside.
- Emulsify Fats and Sugars: In a large bowl, whisk melted butter, dark brown sugar, and granulated sugar until smooth and glossy (about 1 minute). Whisk in the whole egg, egg yolk, and vanilla until fully incorporated and slightly thickened.
- Bring Together Gently: Pour the dry ingredients into the wet mixture. Fold with a silicone spatula just until a few dry streaks remain. Fold in the chocolate chips until evenly dispersed. Do not overwork the dough.
- The Secret Chill: Portion the dough into 16 balls (roughly 55g each) on a plate. Cover and chill in the refrigerator for at least 1 hour (or up to 24 hours). This hydrates the flour starches and solidifies the butterfat, producing a crisp edge, chewy center, and deep caramel flavor.
- Bake: Arrange chilled dough balls 2 inches apart on parchment-lined aluminum baking sheets. Bake at 375°F (190°C) for 10 to 12 minutes, until edges are golden and set, but centers remain pale and soft.
- Cool: Let cookies rest on the baking sheet for 5 minutes before transferring to a wire cooling rack to set completely.
Golden Rules for Every Bake
- Read the Recipe Completely First: Read through ingredients, temperatures, and steps from start to finish before taking anything out of the pantry.
- Bring Ingredients to Room Temperature: Unless a recipe explicitly calls for cold butter or ice water, keep eggs, milk, sour cream, and butter at room temperature (around 65°F–68°F / 18°C–20°C). Ingredients at the same temperature form stable emulsions easily.
- Resist Opening the Oven Door: Each time the oven door opens, internal temperatures drop by 25°F to 50°F (15°C to 30°C). Use your oven interior light to monitor browning during the first three-quarters of the bake.
- Cool Completely on Wire Racks: Residual heat inside cakes, breads, and cookies continues to set their internal starch networks. Slicing into a warm loaf or frosting a warm cake traps steam, turning light crumbs gummy and melting buttercreams.
Baking rewards patience, precision, and observation. By weighing your ingredients, mastering foundational mixing techniques, and learning how your oven behaves, you turn baking from an unpredictable gamble into a dependable, creative craft.